| What is the Worksheet Wizard? |
| The Worksheet Wizard is program that allows users to input pictures or text into pre-formatted worksheets. This allows users to create relevant and great looking worksheets in seconds. |
| How do I use the Worksheet Wizard? |
There are 2 types of worksheets you can make, picture-based worksheets and text-based worksheets.
Picture-based worksheets allow you to choose pictures from the flash card gallery and insert them into your worksheet along with corresponding text. Learn more...
Text-based worksheets allow you to choose from a word list, that you create, and insert those words, phrases, sentences and questions into your worksheet. Learn more... |
| How do I make a picture-based worksheet? |
Picture-based worksheets allow you to choose pictures from the flash card gallery and insert them into your
worksheet along with corresponding text.
Follow these steps to create a picture-based worksheet.
- First you will need to add some pictures to your picture list. (Some worksheets require only 1 picture while others may require up to 24 pictures.)
To add pictures to your list go to the flash card gallery.
- Select the checkbox next to each picture you want to use.
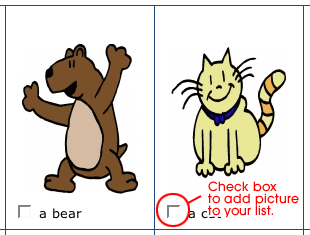
- Click the "Add selected pictures to my list!" button.

- After you have selected all the pictures you want to use, return to the Worksheet Wizard.
- Select a worksheet to make from the "Worksheets with Pictures" list.
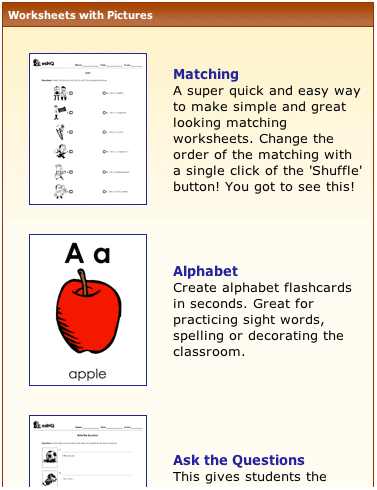
- Type the title of your worksheet. You will be able to edit the title of your worksheet at anytime.
- Now you need to add pictures from your list to the worksheet. On this page you can see how many pictures are required to make this worksheet, how many pictures are allowed and how many you have already selected. Once you have met the minimum requirement, you will see the "Make Worksheet" button.
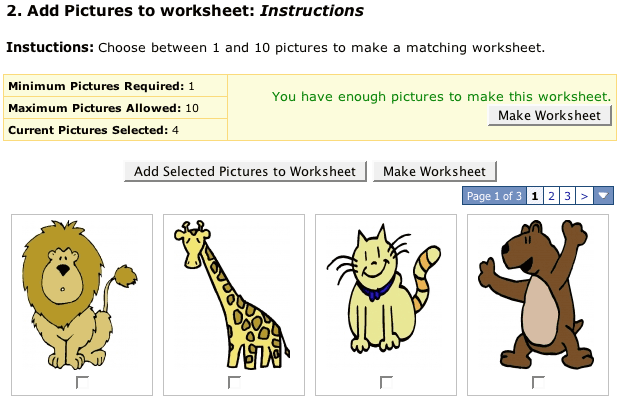
You can add the same picture more than once.
If you don't have enough pictures in your picture list or you want to add more pictures to your picture list, return to the
flash card gallery and repeat steps 1 through 4. You can find the worksheet you just started by clicking
"My Saved Worksheets". Click "edit" next to the title of the worksheet you
just started and you will either be directed to the "add pictures" page where you can continue adding pictures to this worksheet or
you will be directed to the edit page. Scroll to the bottom of the edit page and you will see a "Add More Pictures" button.
- Once you have added all the pictures you want to use to this worksheet, click "Make Worksheet".
- At the top of the worksheet edit page you will find the title, directions, target structure and vocabulary and tips for this worksheet.
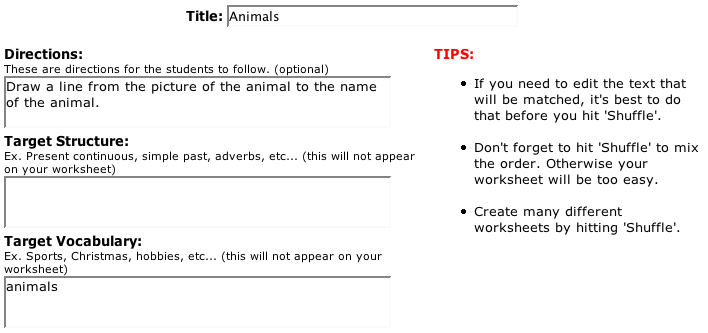 - Title: This is the title of your worksheet and it will appear at the top of most of the worksheets you make.
- Directions: These are directions for your students to follow. This is optional.
- Target Structure: If appropriate, please type in what structure you are teaching by using this worksheet. In the future, worksheets will be searchable based on this criteria.
- Target Vocabulary: If appropriate, please type in what vocabulary you are teaching by using this worksheet. In the future, worksheets will be searchable based on this criteria.
- Tips: You should always read the "Tips" section for ideas on how to make your worksheet better or how to use specific aspects of the worksheet you have chosen.
- After you have finished your worksheet, go to the bottom of the editing page and click "Preview". By clicking "Preview" it will save any
changes you have made and then direct you to the preview page.
- If you are happy with how your worksheet looks, scroll to the bottom of your page and click either "Quick Print" or "Save and Print PDF".
If you want to make some changes to your worksheet, click the "Edit Worksheet" button.
|
| How do I make a text-based worksheet? |
Text-based worksheets allow you to choose from a word list, that you create, and insert those
words, phrases, sentences and questions into your worksheet.
Follow these steps to create a text-based worksheet.
- First you will need to add some words, phrases, sentences or questions to your word list. (Some worksheets require only 1 word
while others may require up to 24 words.)
To add words to your list go to the "Add Words To Your List" page.
- Type in the words and sentences that you want to use in a worksheet.
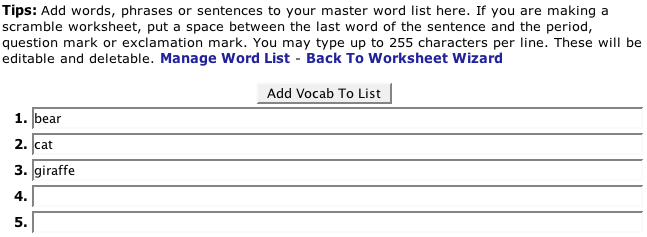
- Click the "Add Vocab To List" button.
- After you have selected all the words you want to use, return to the Worksheet Wizard.
- Select a worksheet to make from the "Worksheets with Words" list.
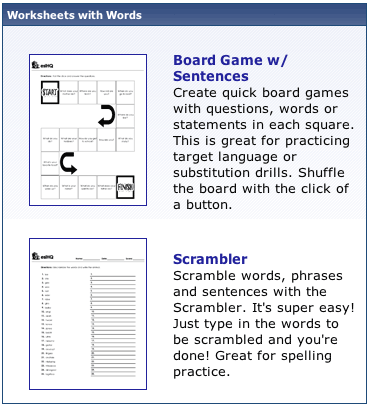
- Type the title of your worksheet. You will be able to edit the title of your worksheet at anytime.
- Now you need to add words from your word list to the worksheet.
On this page you can see how many words are required to make this worksheet,
how many words are allowed and how many you have already selected.
Once you have met the minimum requirement, you will see the "Make Worksheet" button.
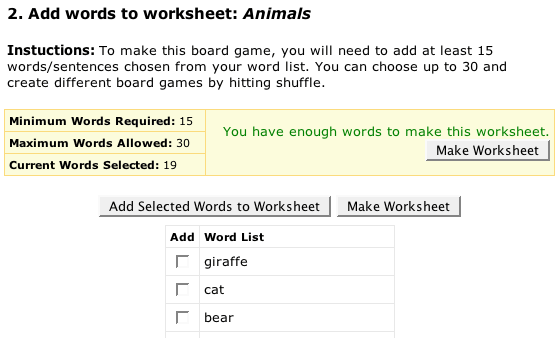
You can add the same words more than once.
If you don't have enough words in your word list or you want to add more words to your word list, return to the
Add Words To Your List page and repeat steps
1 through 4. You can find the worksheet you just
started by clicking
"My Saved Worksheets". Click "edit" next to the title of the
worksheet you
just started and you will either be directed to the "add words" page where you can continue adding words to this worksheet or
you will be directed to the edit page. Scroll to the bottom of the edit page and you will see a "Add More Words" button.
- Once you have added all the words you want to use to this worksheet, click "Make Worksheet".
- At the top of the worksheet edit page you will find the title, directions, target structure and vocabulary and tips for this
worksheet.
 - Title: This is the title of your worksheet and it will appear at the top of most of the worksheets
you make.
- Directions: These are directions for your students to follow. This is optional.
- Target Structure: If appropriate, please type in what structure you are teaching by using this worksheet.
In the future, worksheets will be searchable based on this criteria.
- Target Vocabulary: If appropriate, please type in what vocabulary you are teaching by using this worksheet.
In the future, worksheets will be searchable based on this criteria.
- Tips: You should always read the "Tips" section for ideas on how to make your worksheet better or how
to use specific aspects of the worksheet you have chosen.
- After you have finished your worksheet, go to the bottom of the editing page and click "Preview". By clicking "Preview" it will
save any
changes you have made and then direct you to the preview page.
- If you are happy with how your worksheet looks, scroll to the bottom of your page and click either "Quick Print" or "Save and
Print PDF".
If you want to make some changes to your worksheet, click the "Edit Worksheet" button.
|
| What is Quick Print? |
| Quick Print formats your worksheet for printing from your internet browser (ie. Internet Explorer, Firefox, Netscape, etc...). Please see "Printing Tips" to get the best print from your internet browser. |
| About Saving and Printing PDF's |
PDF stands for Portable Document Format. The advantage of using PDF's is that a PDF will look the same on any computer in any country whereas other types of files like Microsoft Word documents may look very different on different computers.
Adobe's Acrobat Reader is required to view PDF file and it is free and can be downloaded here:

We recommend that you use the "Save and Print PDF" option for printing your worksheet. By using this option it will save a hard copy on your computer which you will be able to use over and over again. Plus, the worksheet will be formatted properly. |
| How do I delete pictures from my picture list? |
Deleting pictures from your picture list is very easy. Go to "Edit Your Picture List", select the pictures you want to delete and click the "Delete Selected Pictures From List" button.
Note: Deleting pictures from your picture list will NOT affect any worksheet that you have made. |
| How do I delete words from my word list? |
Deleting words from your word list is very easy. Go to "Edit Your Word List", select the words you want to delete and click the "Delete Selected Words From List" button.
Note: Deleting words from your word list will NOT affect any worksheet that you have made. |
| How can I edit my word list? |
Editing words in your word list is very easy. Go to "Edit Your Word List". Make the appropriate changes and click "Save Changes".
Note: Editing words in your word list will NOT affect any worksheet that you have made. |
| How do I save my worksheets? |
| Your worksheets are automatically saved the moment you submit a title for any worksheet you make (except for the Word Search Puzzle). |
| Can I delete my worksheet? |
Yes, you can delete the worksheets you have made.
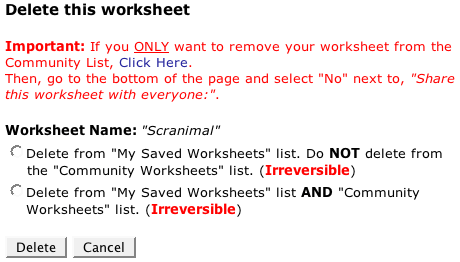
If the worksheet you made is not a community worksheet, you will be given the choice of deleting it from your "My Saved Worksheets" list.
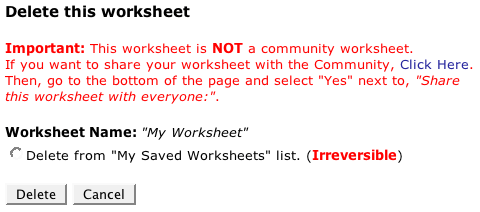
If the worksheet you made is also a community worksheet, you will be given 2 choices. You can delete the worksheet from ONLY your "My Saved Worksheets" list but leave it in the community list or you can permanently delete the worksheet from both lists.
 |
| What are My Saved Worksheets? |
| My Saved Worksheets are worksheets you have made (or started to make) using the Worksheet Wizard (Word Search Puzzles not included). |
| What are Community Worksheets? |
| Community Worksheets are worksheets teachers have made using the Worksheet Wizard which are available to everyone. |
| How can I add my worksheet to the Community Worksheet list? |
Adding your worksheets to the Community Worksheet list is easy and encouraged. When you have finished making your worksheet, select "Yes" for "Share this worksheet with everyone:" at the bottom of your worksheet edit page.
You will always be able to remove your worksheet from the community list by following the same steps and selecting "No". |
| Where are the minicards? |
| Minicards have moved from the flash card gallery to the Worksheet Wizard. This will allow you to save your minicards as well as select custom titles for the cards. |
| How can I print just one flash card? |
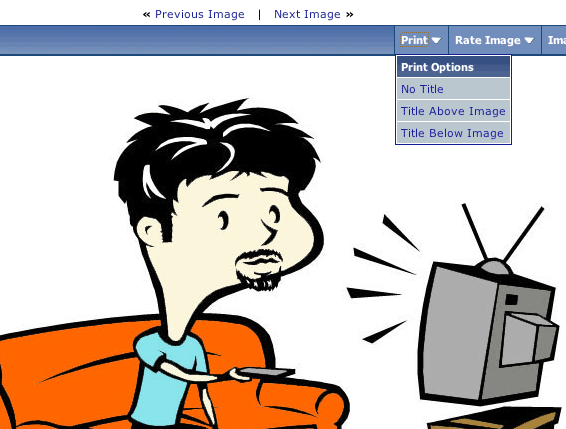
Currently, printing large flash cards is done in the flash card gallery. Just click on a thumbnail of the picture you want to use. Then above the picture you will see "Print". Click "Print" and select an option from the drop down list.
 |
| How can I add my own pictures to the worksheets? |
You can easily add your own pictures to your worksheets. You can not add pictures to categories that already exist. You need to create a new category. This category will only be accessible by you. To make your own picture category and add images to it, please read the following.
Instructions:
You must be a registered user to use this feature. You can register here.
Step One: Make your category to put your images in. First go to the flash card gallery and click "My Stuff" and then select "Category Admin" from the drop down menu.

Step Two: Click "Add Category".

Step Three: Name & describe your category.
Title = Your eslHQ User Name
Description = Optional
Parent Category = Member Galleries

Step Four: Now you are ready to upload and access your images. Go to the flash card homepage and scroll to the bottom of the list. There you should see your new category.

Step Five: Click "Upload" to add pictures to your category to use in worksheets.

Note: There are limitations to what you can do but it is possible.- Your picture will work best if it is a portrait picture and not a landscape picture.
- For the worksheet to look best the image you upload should be exactly 612px wide by 792px high.
- Maximum dimensions are 612px wide by 792px high (ratio 1:1.29).
- Images that aren't of the correct ratio (1:1.29) may cause your worksheet to look bad.
- Worksheets that you make using your own pictures may NOT be added to the community list.
- This feature is still in beta mode which means there still may be problems or glitches. Please report problems in this thread.
If you have pictures you want to use but they are the wrong size, resize your pictures here!
If you have problems using this feature please post your questions here! |
All times are GMT -5. The time now is 10:56 pm.
All materials from this website are for classroom-use only. Digital redistribution of materials, in part or in whole, is strictly forbidden! 


